NM Dev Setup Guide
Setup Guide
This tutorial is on how to set up the development environment for programming with the NM Dev library (the Java version). In order to use the NM Dev library, you need to know some Java programming. Sun (or Oracle) provides excellent online tutorials on learning Java. You can find a lot of easy-to-read-and-follow lessons in Sun’s Java Tutorials.
IDE
You will need an Integrated Development Environment (IDE) to program NM Dev. Although you may choose any IDE you like, we recommend Netbeans. You can download it from here.
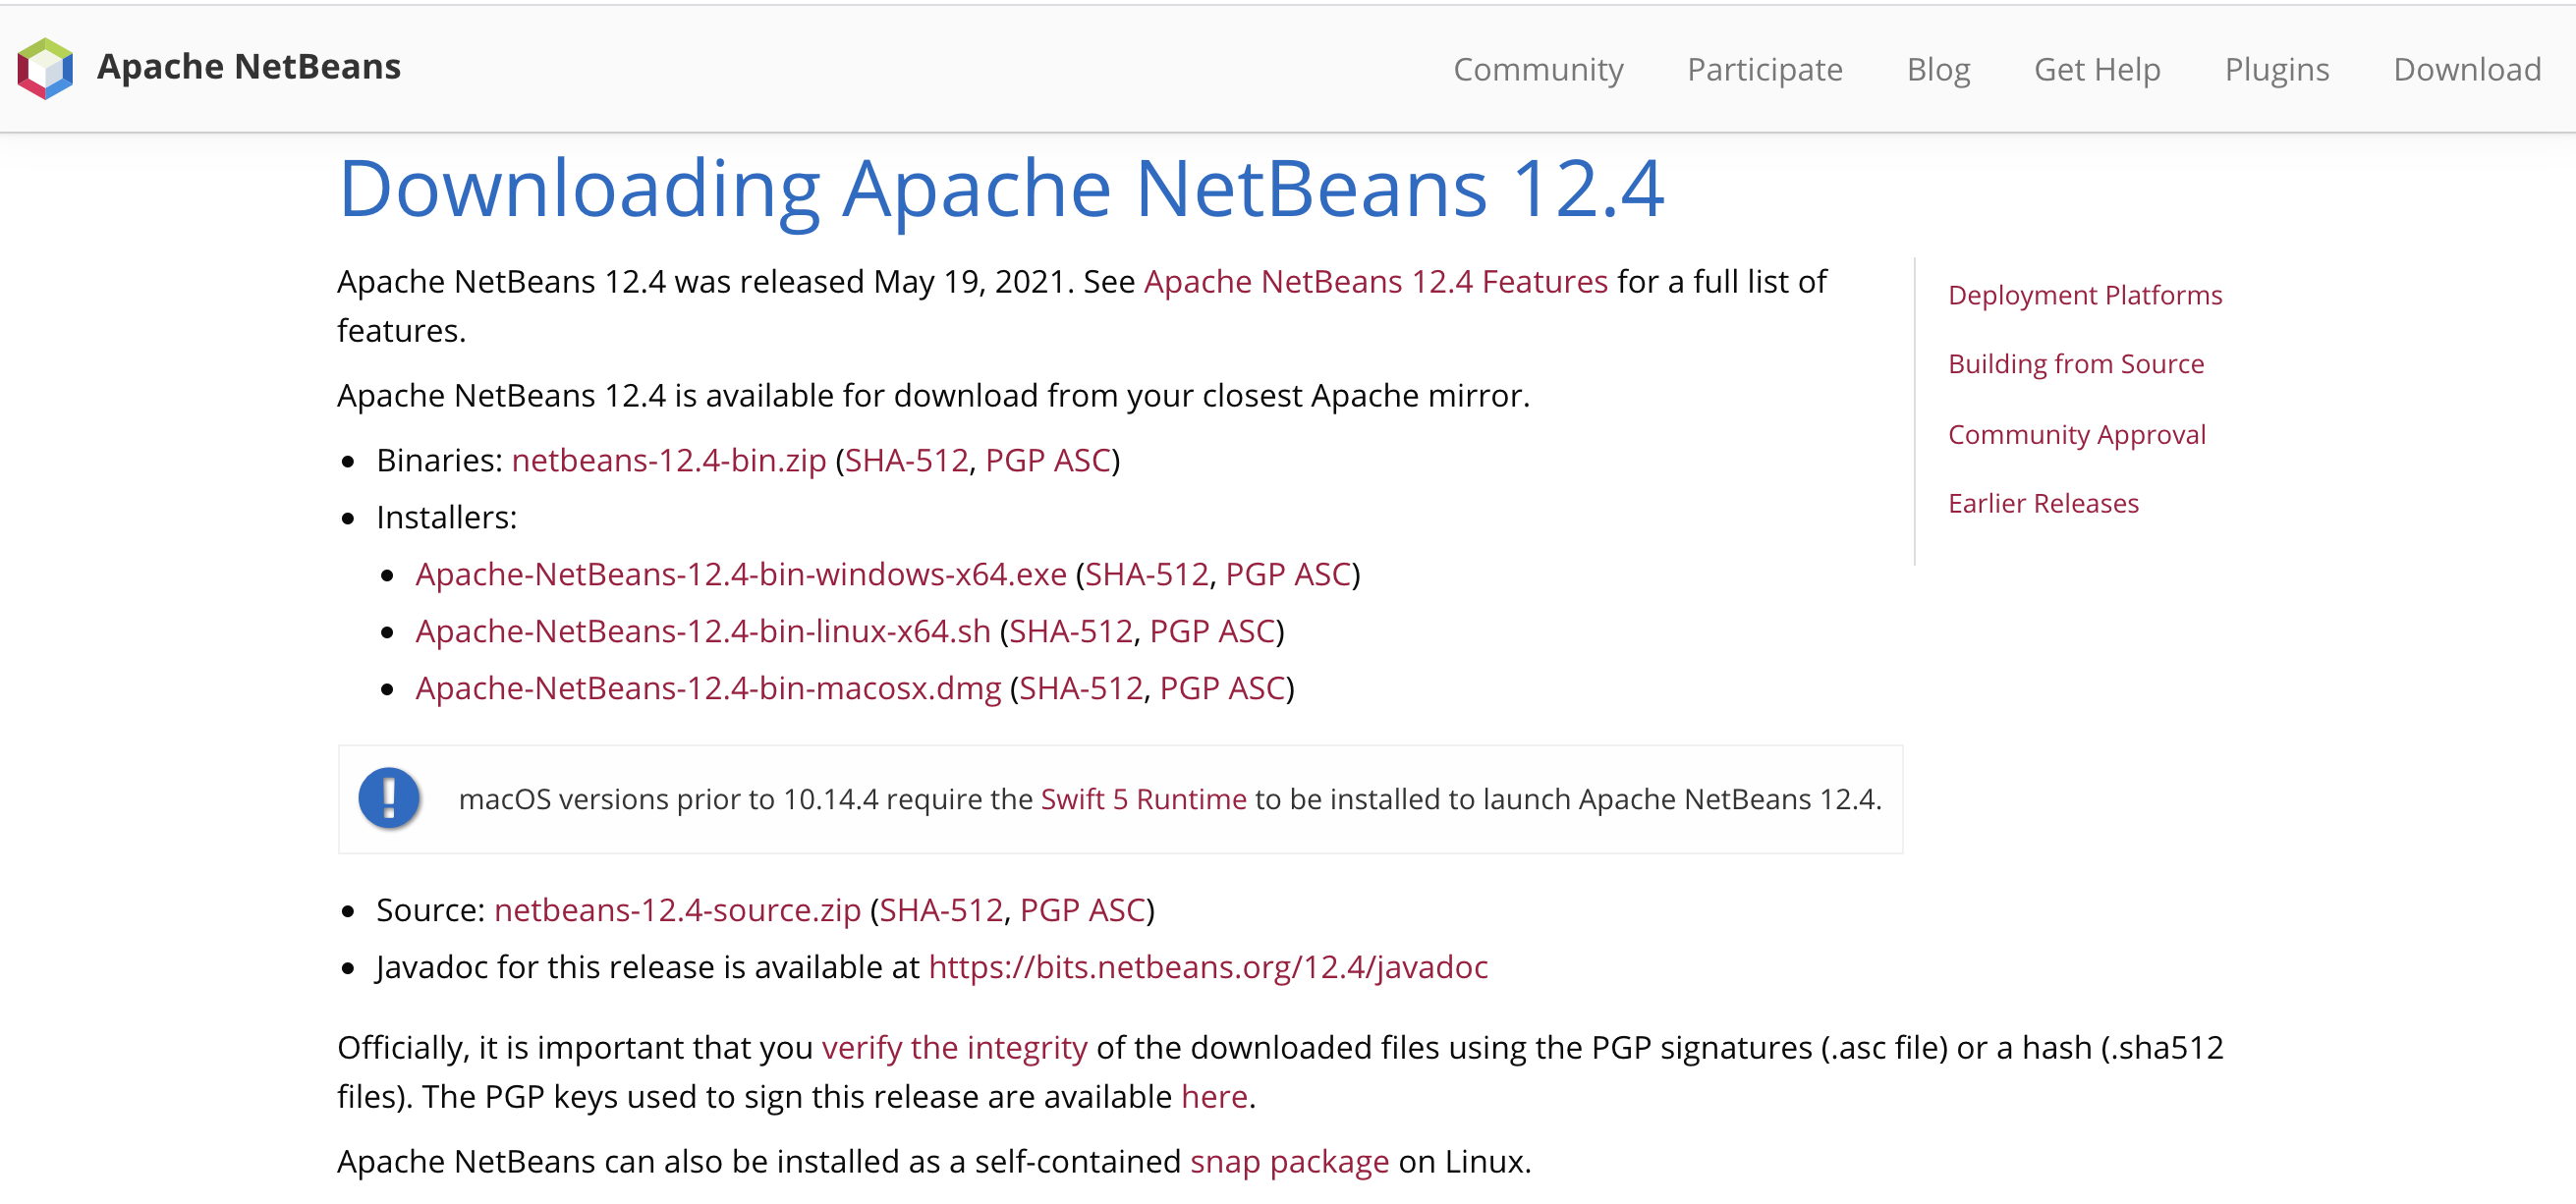
To learn about how to use NetBeans, you will find a quick start tutorial here. The most important skill for you to learn is debugging. This is especially true for those who are converting from Matlab and R and are used to printing out values. NetBeans debugger allows you to easily inspect values, place conditional breakpoints, pause and resume your program and much more. A quick Google search gives these articles.
We cannot emphasize enough that it is imperative that you must master using a debugger to make your programming experience productive and enjoyable.
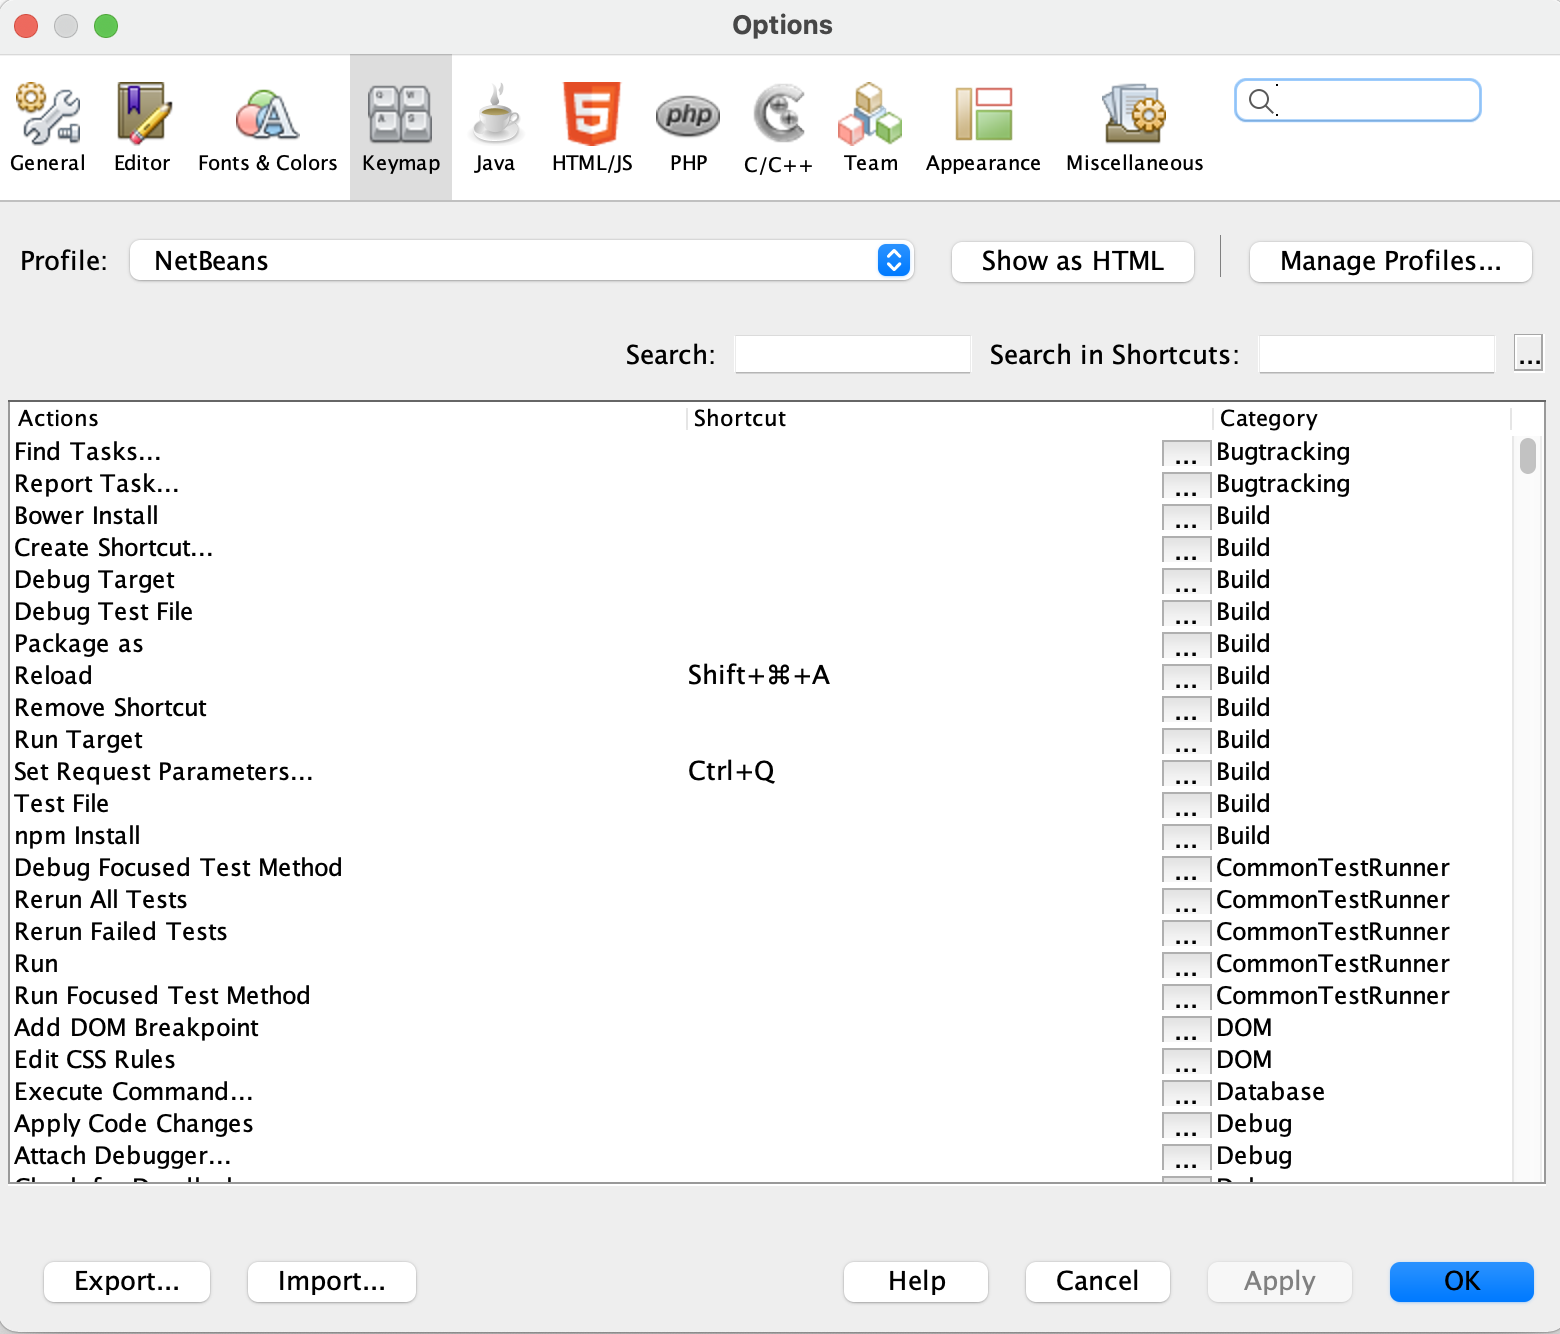
Hotkey is another tool that will increase your programming productivity. My favorite hotkey is Ctrl+Shift+F (or Alt+Shift+f if you are using windows). It makes my code look pretty and neat. A list of hotkeys is found here. You can customize them to your own taste by going to Netbeans -> Preferences -> Keymap (or Tools -> Options -> Keymap for Windows/Linux).
nmdev.jar
To program the NM Dev library, you will need a licensed copy of nmdev.jar (the actual file name depends on the version that you have). It is a compressed file that contains the NM Dev Java classes for numerical computing. To get a copy of the trial license, please email sales@nm.dev.
![]() nmdev-1.0.0.zip (13.1 MiB, 6,015 hits)
nmdev-1.0.0.zip (13.1 MiB, 6,015 hits)
This section walks you through how to set up a NM Dev project. You may skip this section if you want to start programming NM Dev right away using the S2 IDE which comes in-built with NM Dev. Please read our Basic Trails to get started. If in the future you would like to update the NM Dev library for a newer version, you will need to come back to this section.
Create a NM Dev project
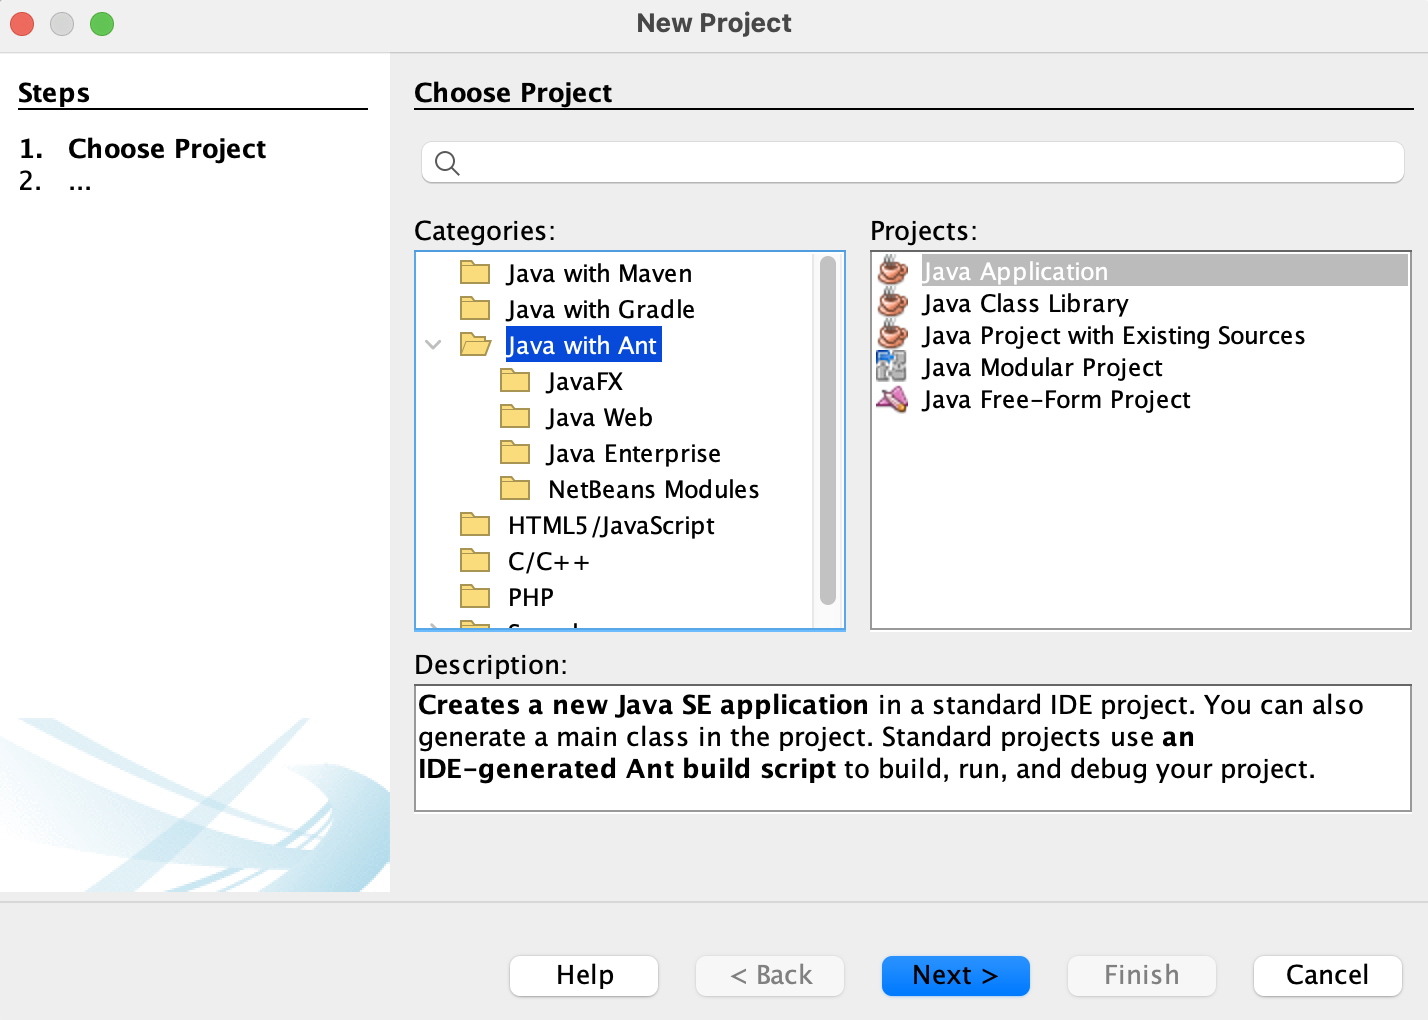
To create a NM Dev project in NetBeans, open the NetBeans IDE, click File -> New Project… (Ctrl+Shift+N). In ‘categories’, choose ‘Java with Ant’; in projects, choose ‘Java Application’. Click ‘Next’.
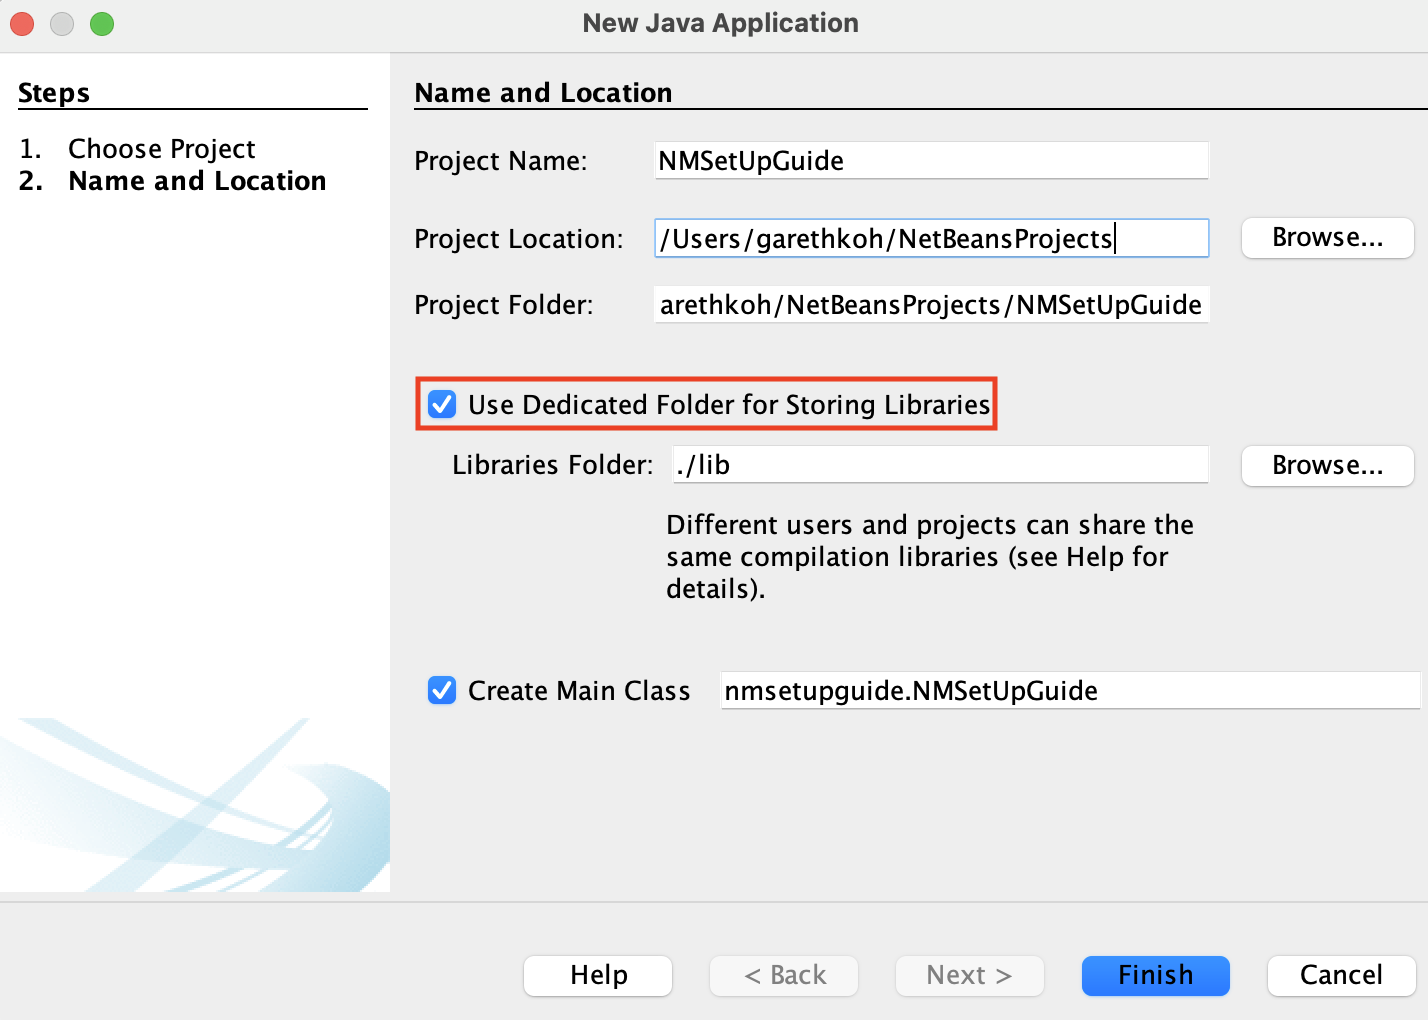
In ‘Project Name’, type whatever you like, e.g., HelloNMDev. In ‘Project Location’, type where you would like to save your project. Make sure the box ‘Use dedicated Folder for Storing Libraries’ is checked.Then click ‘Finish’.
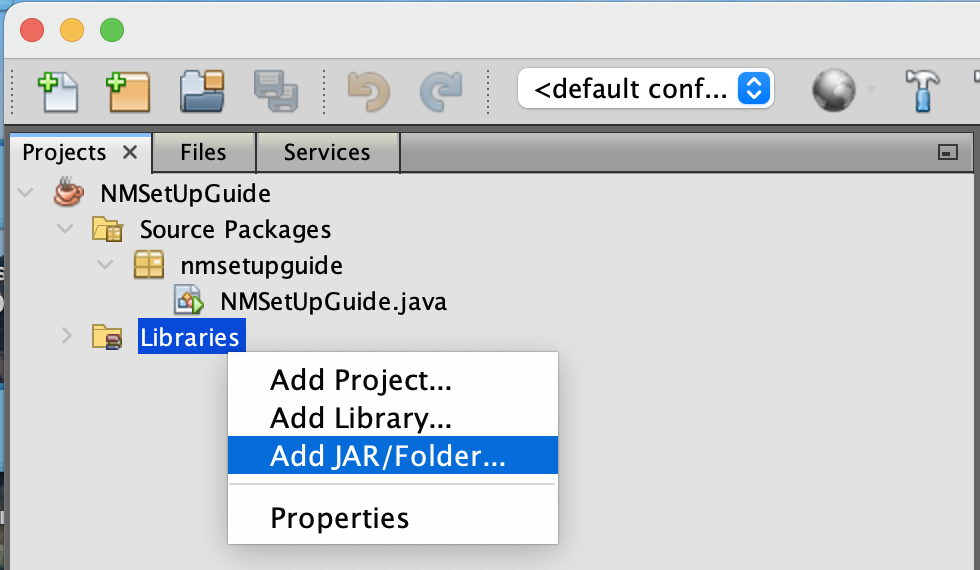
We need to tell this Java project that we will be calling the NM Dev library. To do so, right click on the ‘Libraries’ Folder in the project tab and click ‘Add JAR/Folder’
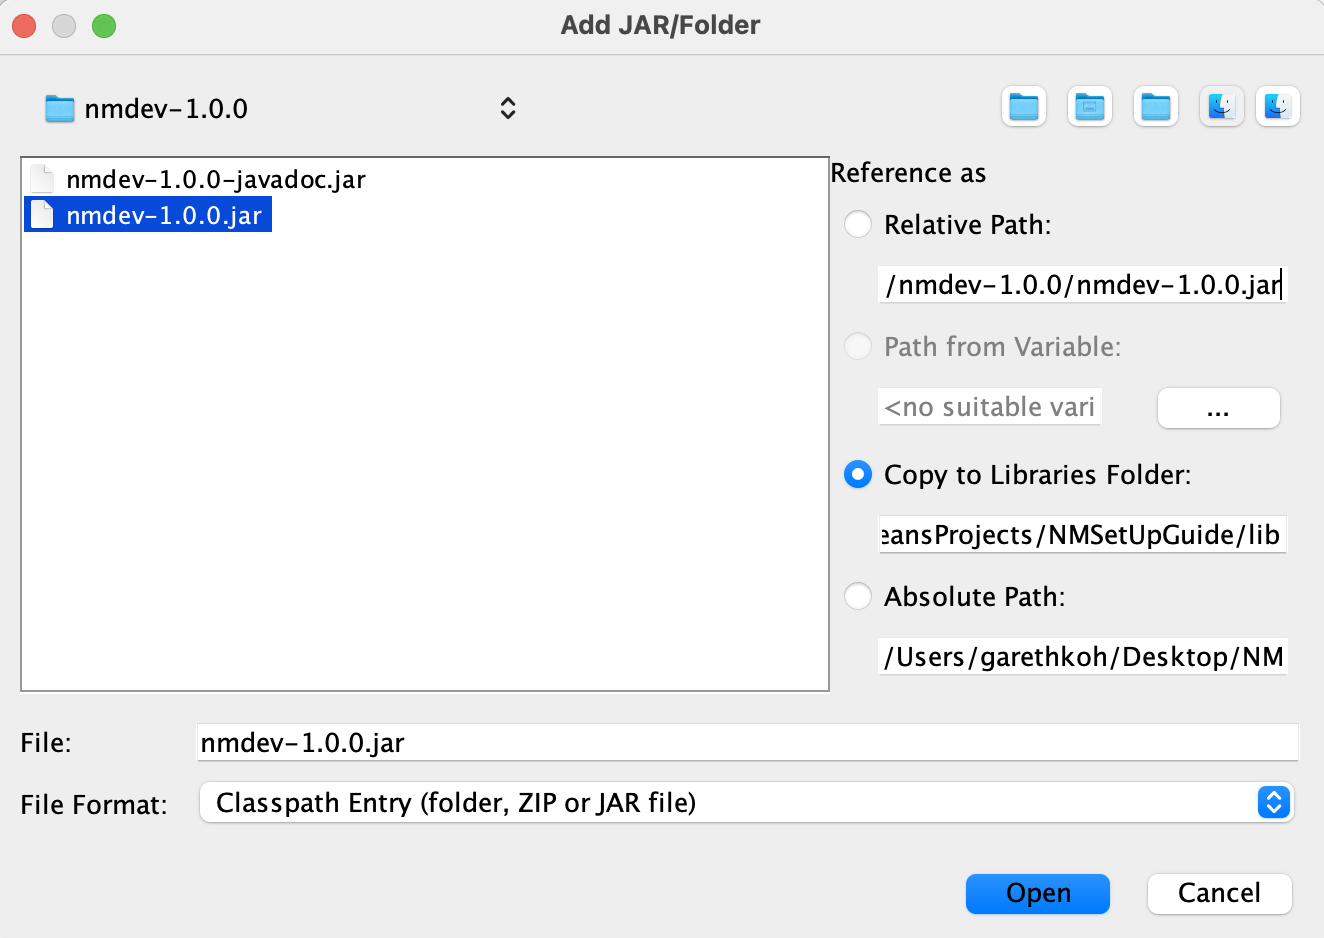
Browse to where you saved nmdev.jar. Select nmdev.jar and then hit ‘Open’.
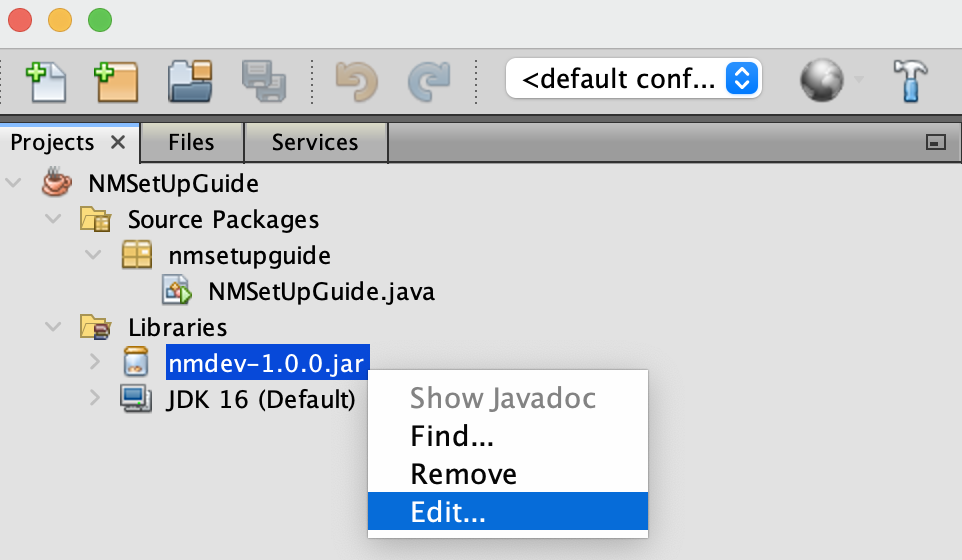
To install the NM Dev javadoc in NetBeans, we need to associate the nmdev.jar with its javadoc. Right click the nmdev.jar file you just added and select ‘Edit’.
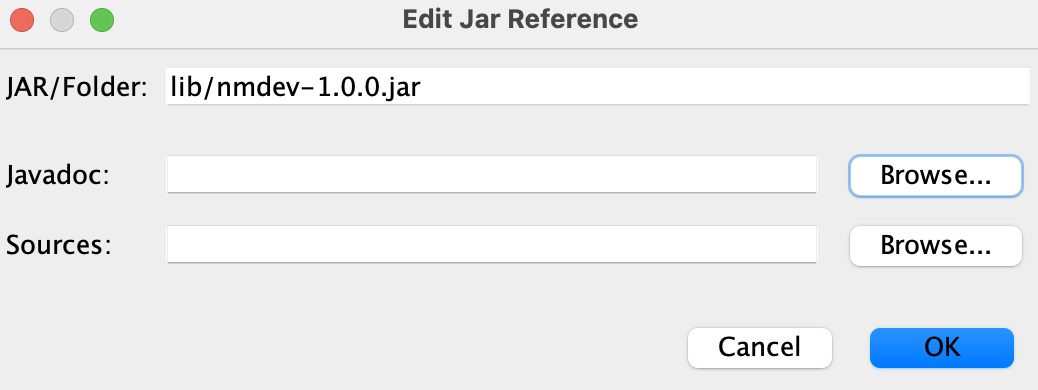
In the popup window, under the ‘javadoc’ section, click ‘Browse’ and select the nmdev-javadoc.jar file. Then click ‘Open’.
Now, you have created an empty NM Dev project. Copy and paste these lines under “// TODO code application logic here”.
[box type=”shadow”]
System.out.println(“Hello NM Dev”);
Matrix A1 = new DenseMatrix(new double[][]{//create a matrix
{1, 2, 1},
{4, 5, 2},
{7, 8, 1}
});
System.out.println(A1);
Matrix B = new Inverse(A1);//compute the inverse of A1
Matrix I = A1.multiply(B);//this should be the identity matrix
System.out.println(String.format(“%s * %s = %s (the identity matrix)”,
A1,
B,
I));
[/box]
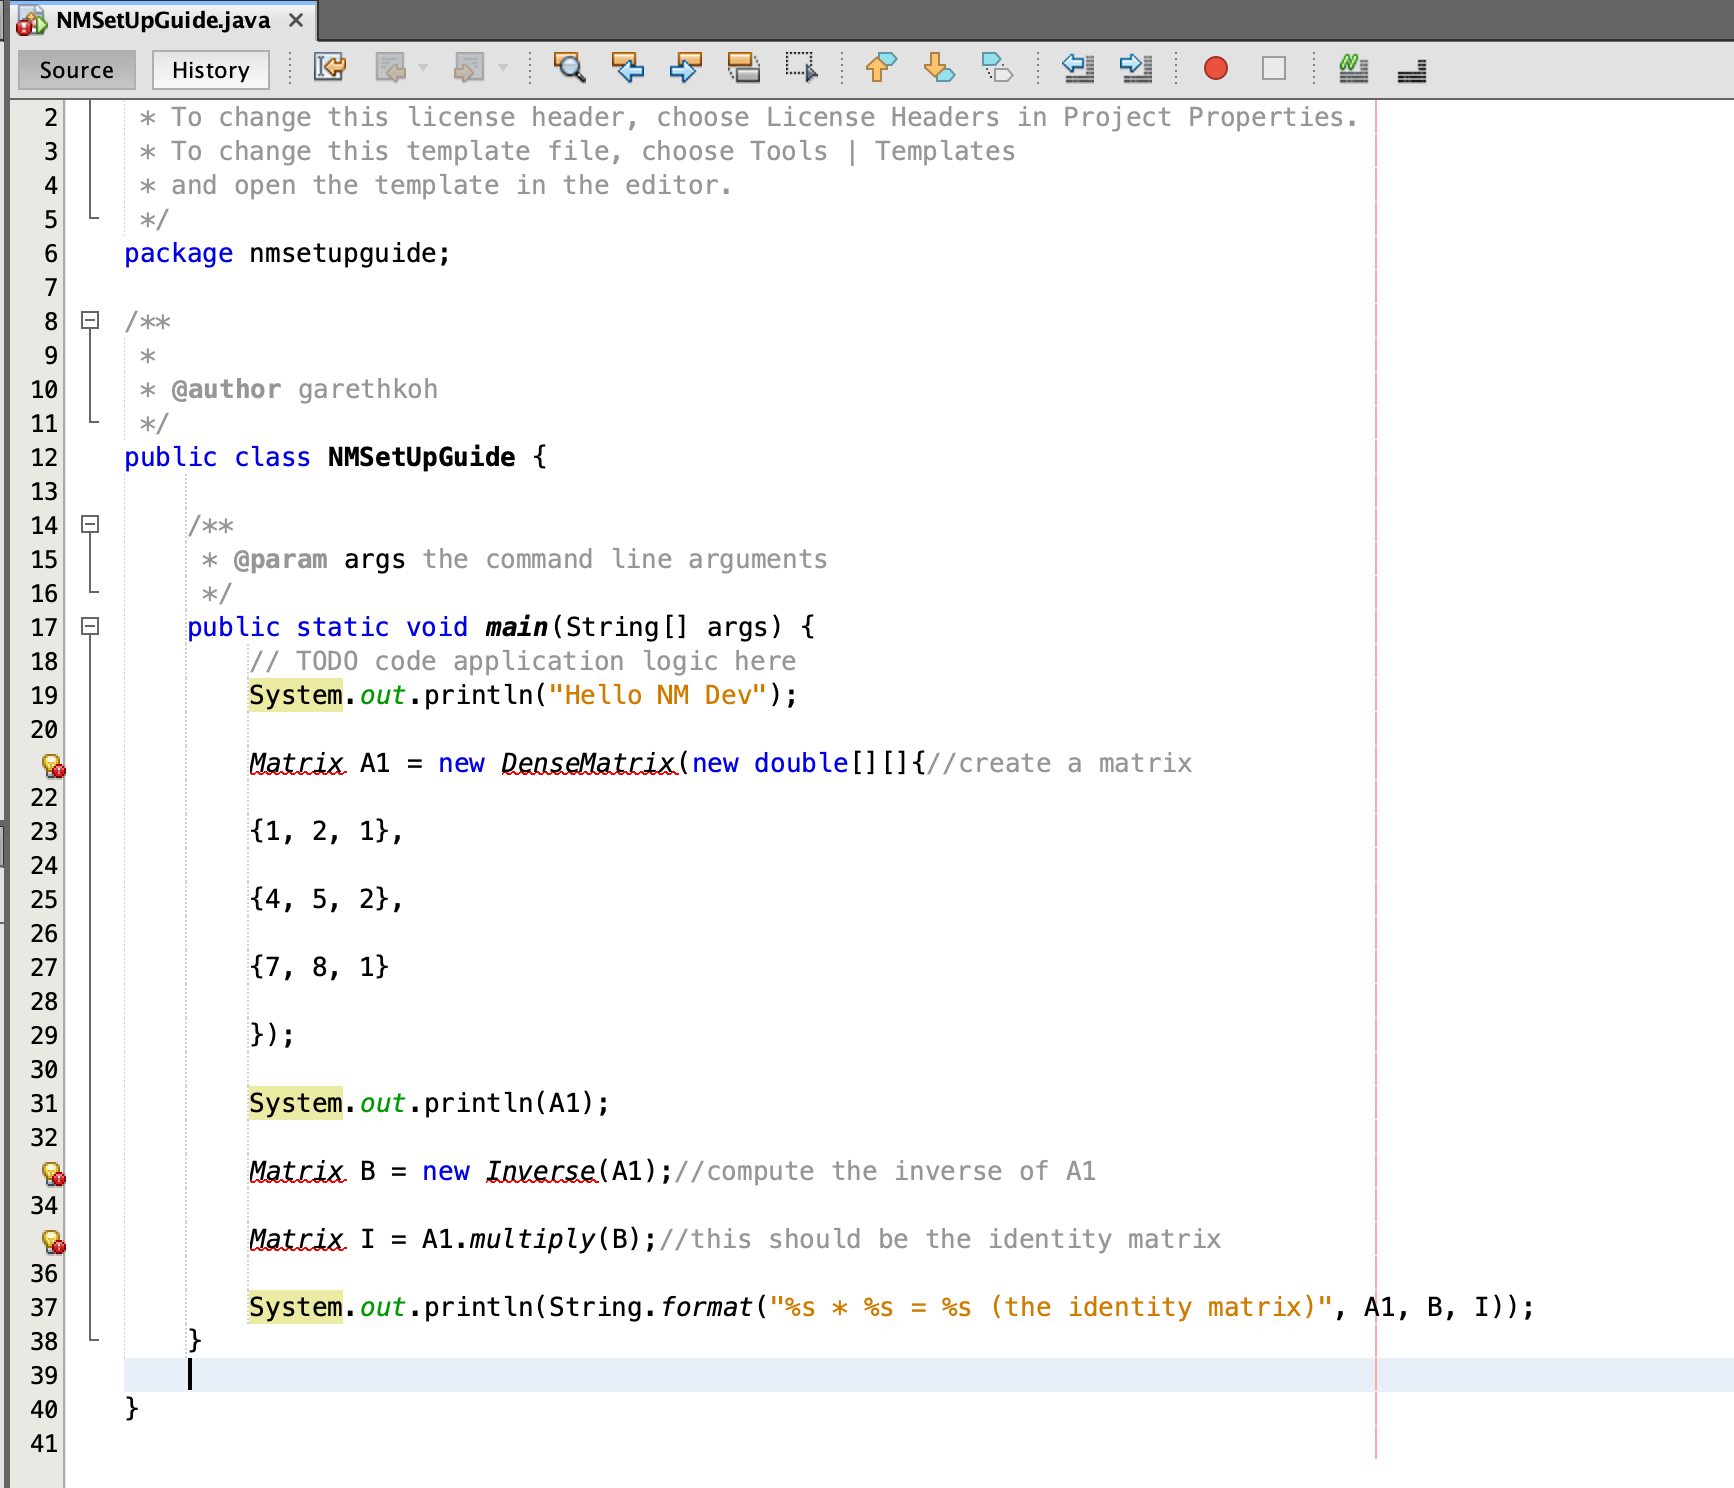
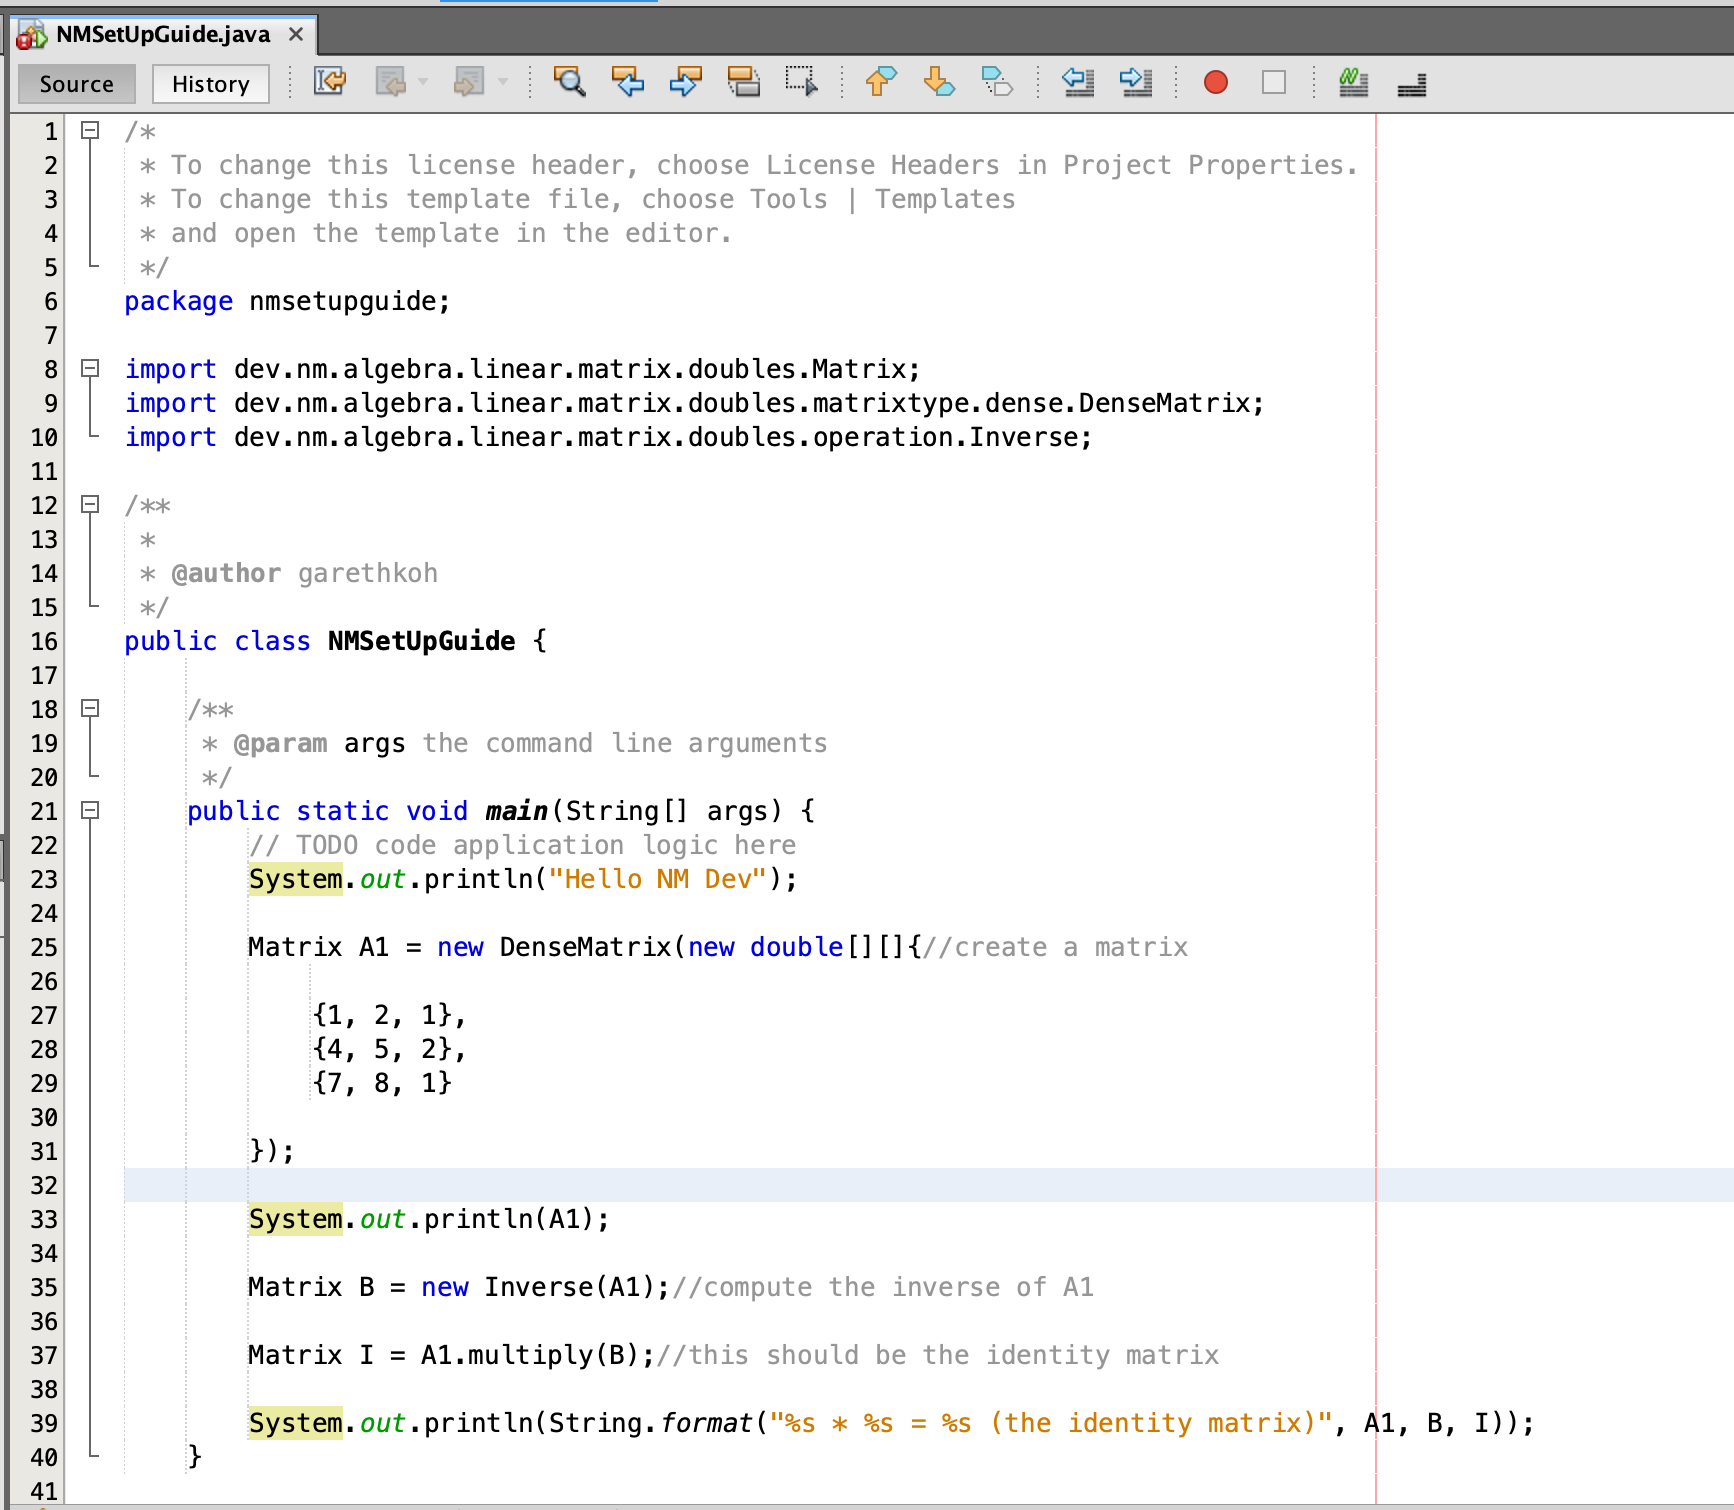
Hit Command+Shift+I (or Ctrl+Shift+I on Windows/Linux) to fix the necessary imports. Make sure these statements appear at the top of your program. Else you can input them manually.
[box type=”shadow”]
import dev.nm.algebra.linear.matrix.doubles.Matrix;
import dev.nm.algebra.linear.matrix.doubles.matrixtype.dense.DenseMatrix;
import dev.nm.algebra.linear.matrix.doubles.operation.Inverse;
[/box]
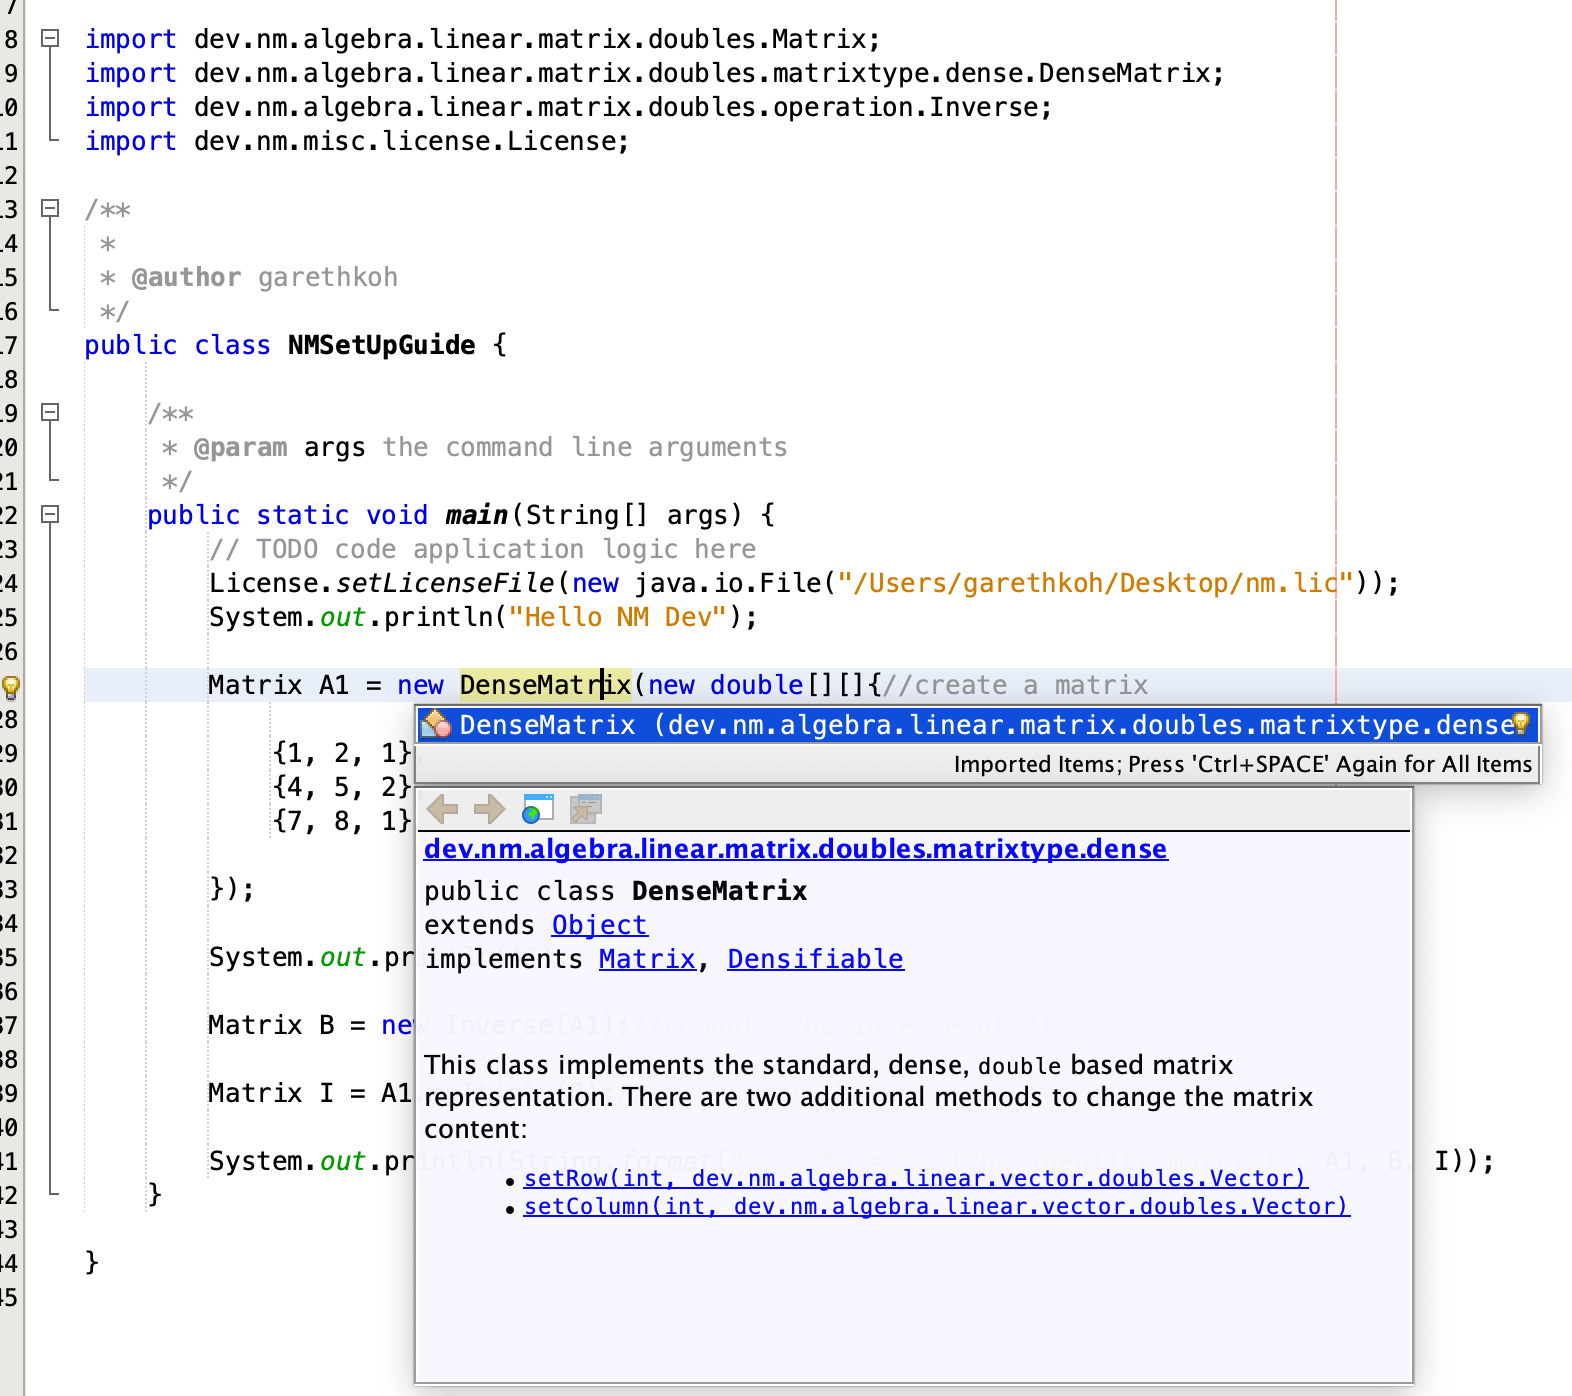
Hit Alt+Shift+F to beautify your code. Your code should look something like this.
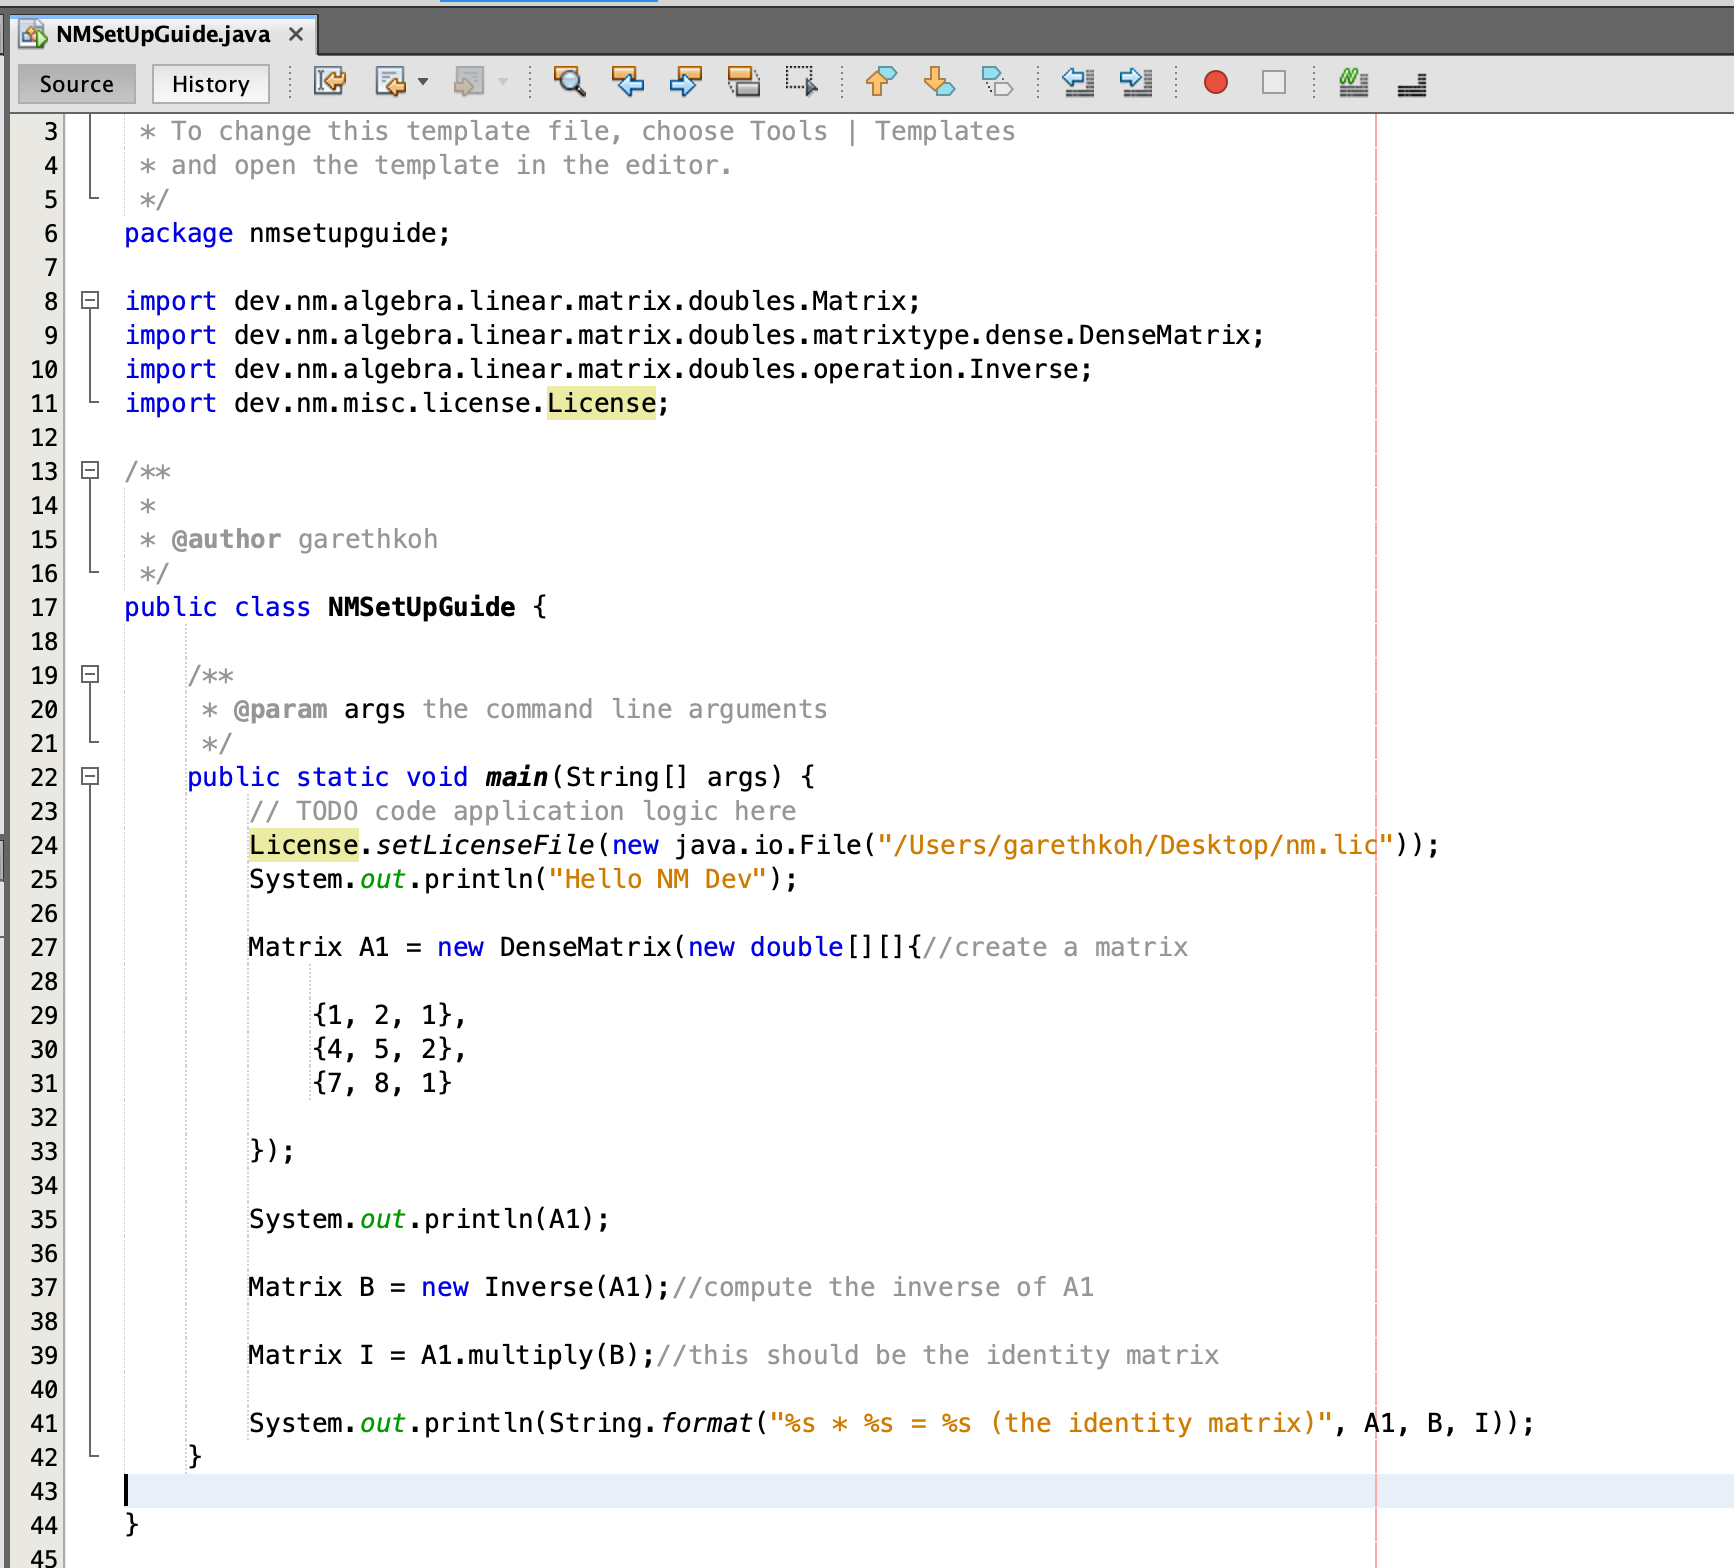
Before you can run your code you will have to place your license file by doing
[box type=”shadow”]
import dev.nm.misc.license.License;
License.setLicenseFile(new java.io.File(“your license path”));
[/box]
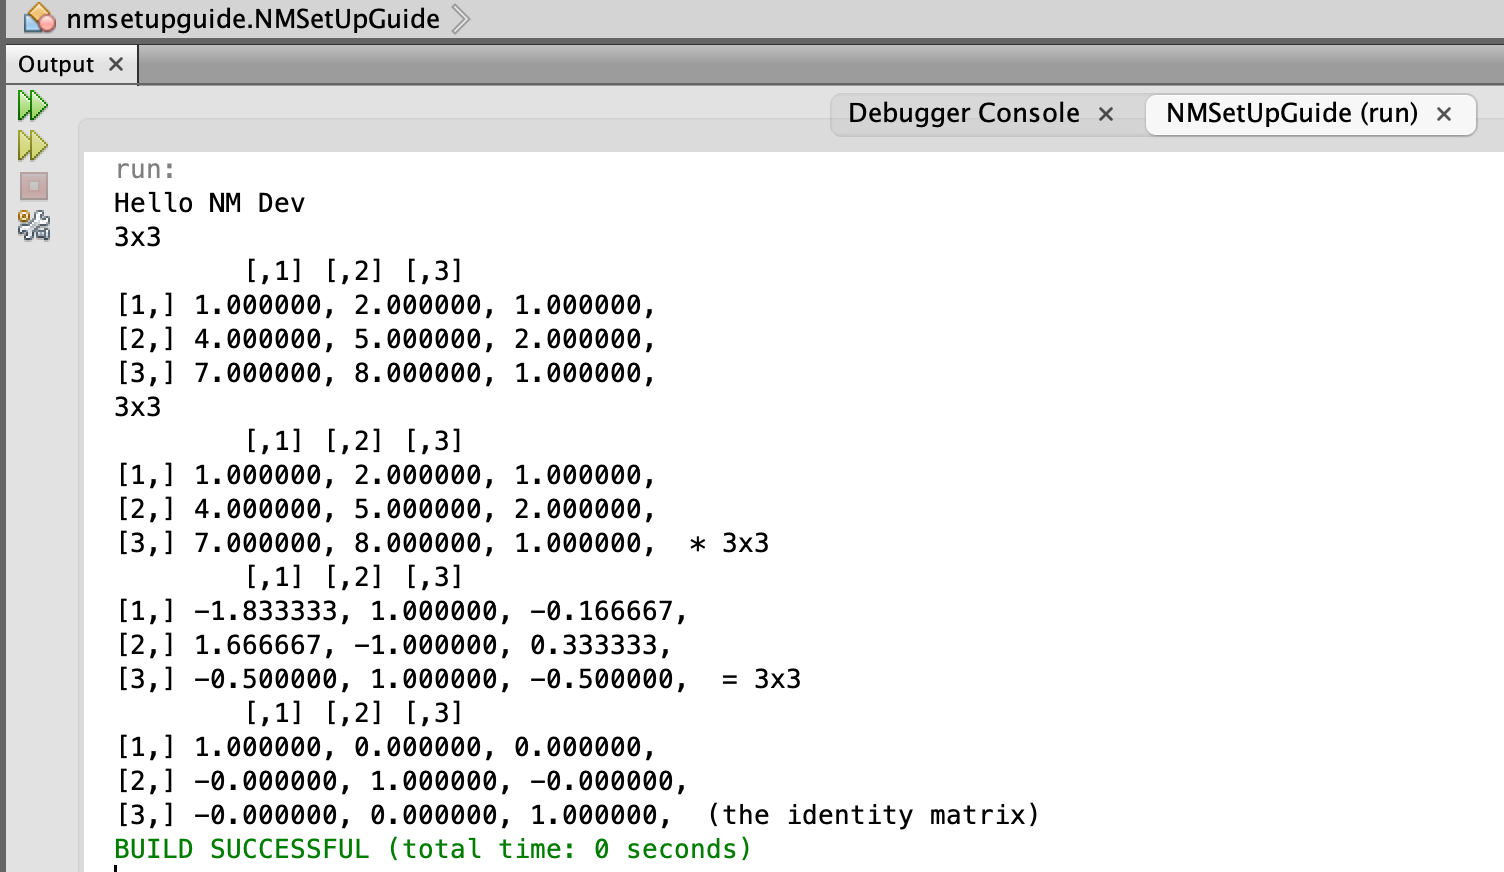
Right click on the project name, e.g., HelloNMDev, and click ‘Run’ (or simply press F6 if you make this project your main project). Voila! You should see this in your output window (Ctrl+4).
Congratulations!
Javadoc
NM Dev’s javadoc is the complete reference to the NM Dev library. You can read it in a browser, e.g., Internet Explorer. You can bring them up dynamically during programming. Each time you press Ctrl+SPACE after the ‘.’ of any object you create, you will see a list of available methods for this object, and the javadoc for the method selected.
To get more information about programming NM Dev, please consult our tutorials.